Introduction
In this tutorial, we’ll show you how to create an AJAX Registration Form with Validation in CodeIgniter.
Using jQuery AJAX makes it easy to submit form data without reloading the page, resulting in a faster and more interactive user experience.
By the end of this guide, you’ll know how to:
- Create a registration form in CodeIgniter
- Validate form fields using jQuery
- Submit data using AJAX
- Insert user details into a MySQL database through CodeIgniter models
If you’re new to CodeIgniter, first check our setup guide:
How to Install CodeIgniter on Localhost
Step 1: Create the HTML Registration Form
Start by creating a simple HTML file in your views folder — let’s call it index.php.
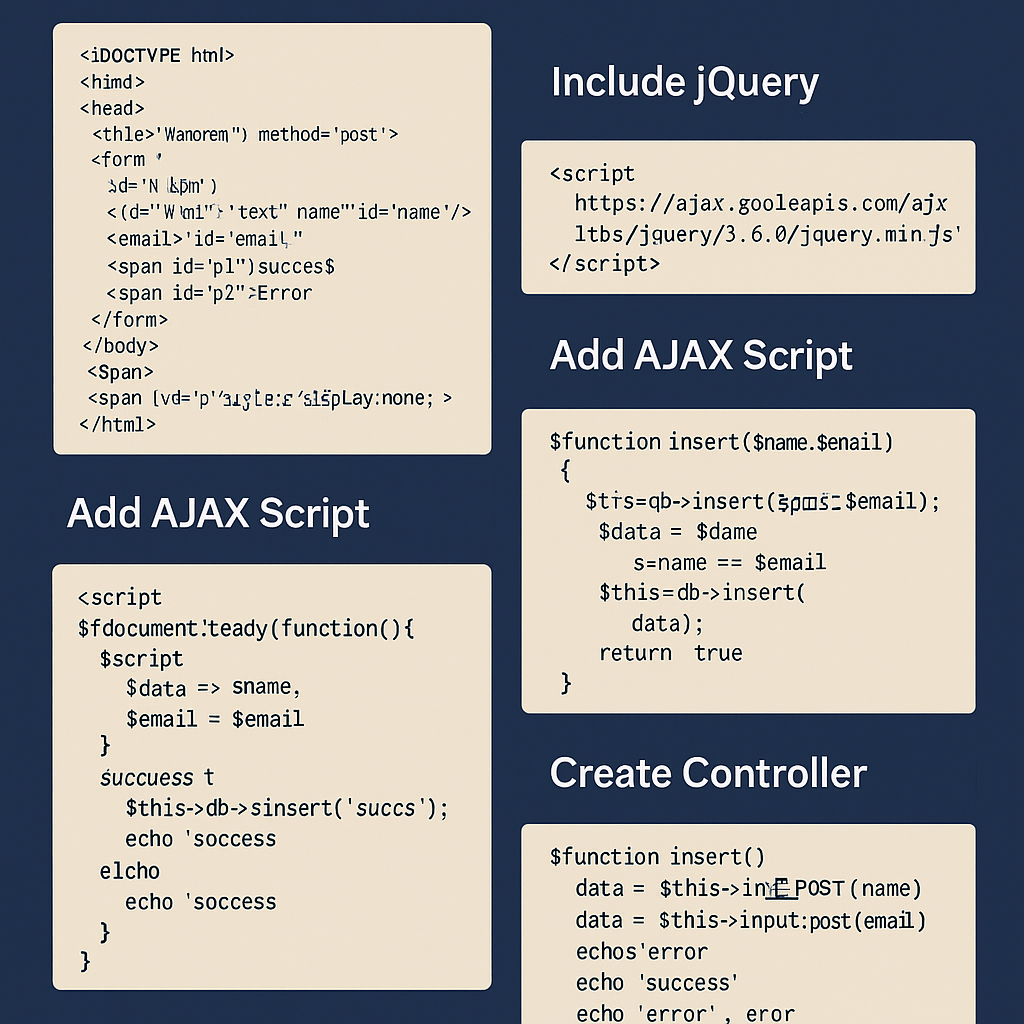
<!DOCTYPE html>
<html>
<head>
  <title>Registration | Gyaando</title>
</head>
<body>
  <form id="form" method="post">
    <table>
      <tr>
        <td>Name:</td>
        <td><input type="text" name="name" id="name"/></td>
      </tr>
      <tr>
        <td>Email:</td>
        <td><input type="email" name="email" id="email"/></td>
      </tr>
      <tr>
        <td colspan="2">
          <input type="button" name="submit" id="submit" value="Register">
        </td>
      </tr>
    </table>
    <span id="p1" style="display:none; color:green;">Success</span>
    <span id="p2" style="display:none; color:red;">Error</span>
  </form>
</body>
</html>
✅ This form collects user name and email and displays success/error messages dynamically.
Step 2: Include jQuery Library
To use AJAX and form validation, add the jQuery library inside your <head> section.
<script src="https://ajax.googleapis.com/ajax/libs/jquery/3.6.0/jquery.min.js"></script>
Tip: Always use the latest stable version of jQuery for better performance and security.
Step 3: Add AJAX Script
Now, just before the closing </body> tag, include the following AJAX script:
<script>
$(document).ready(function(){
  $('#p1, #p2').hide();

  $("#submit").click(function(){
    var name = $("#name").val();
    var email = $("#email").val();

    // Simple validation
    if(name == "" || email == ""){
      $('#p2').fadeIn().delay(2000).fadeOut();
      return;
    }

    // AJAX request
    $.ajax({
      type: "POST",
      url: "<?php echo base_url('controller_name/insert'); ?>",
      data: { name: name, email: email },
      success: function(response){
        if(response == 'success'){
          $('#p1').fadeIn().delay(2000).fadeOut();
          $('#form').trigger("reset");
        } else {
          $('#p2').fadeIn().delay(2000).fadeOut();
        }
      },
      error: function(){
        $('#p2').fadeIn().delay(2000).fadeOut();
      }
    });
  });
});
</script>
This script:
- Validates form input fields.
- Submits data to the controller using AJAX.
- Displays a success or error message without reloading the page.
Step 4: Create the Model (Database Interaction)
Next, create a model file inside your application/models/ folder.
Example file name: User_model.php
<?php
class User_model extends CI_Model {

  public function insert($name, $email) {
    $data = array(
      'name' => $name,
      'email' => $email
    );
    return $this->db->insert('users', $data);
  }

}
?>
Now open phpMyAdmin → create a new database (e.g. codeigniter_db) → create a table named users with these fields:
id(Primary key, AUTO_INCREMENT)name(VARCHAR)email(VARCHAR)
This model inserts data into the database using CodeIgniter’s built-in query builder.
Step 5: Create the Controller
Go to the application/controllers/ folder and create a new controller, e.g. User.php
<?php
defined('BASEPATH') OR exit('No direct script access allowed');

class User extends CI_Controller {

  public function __construct() {
    parent::__construct();
    $this->load->model('User_model');
  }

  public function insert() {
    $name = $this->input->post('name');
    $email = $this->input->post('email');

    if(empty($name) || empty($email)) {
      echo 'error';
      return;
    }

    $result = $this->User_model->insert($name, $email);
    echo $result ? 'success' : 'error';
  }
}
?>
This controller:
- Accepts AJAX POST data from the form.
- Validates inputs.
- Calls the model’s insert method.
- Returns either
"success"or"error"as the AJAX response.
Step 6: Run and Test the Application
- Start your local server (XAMPP, WAMP, or MAMP).
- Go to your browser and open:
http://localhost/your_project_folder/index.php/user - Fill out the form and click Register.
- If successful, you’ll see a green “Success” message and data will appear in your MySQL
userstable.
Congratulations! You just created a fully functional AJAX registration form in CodeIgniter.
Internal & External Links
Internal Link:
How to Create a Contact Form with Validation in PHP and jQuery (Coming Soon)
External Link:
Official CodeIgniter Documentation
Conclusion
In this tutorial, we learned how to build a simple AJAX registration form with jQuery validation in CodeIgniter.
Using AJAX allows you to:
- Submit data without reloading the page
- Improve user experience
- Implement lightweight form validation
You can extend this by adding:
- Server-side validation rules
- Email verification
- CSRF token protection for enhanced security
For more helpful tutorials, visit Gyaando.com — your trusted source for web development guides.